Anchoring a power rack is not difficult, but it is one of those garage gym jobs where neatness matters. Four badly drilled holes can leave you with a rack that rocks, cracked concrete and a very annoying repair job. If you want to anchor power rack garage floor fixings properly, check the rack, slab and fixing type before you put a drill anywhere near the concrete.
In This Article
- First Check Whether Your Rack Actually Needs Anchoring
- Check The Garage Floor Before You Drill
- Tools, Fixings And UK Costs
- How To Anchor A Power Rack To Your Garage Floor
- Mistakes That Make A Rack Less Safe
- When Not To Drill
- Final Safety Checks Before Lifting
- Frequently Asked Questions
First Check Whether Your Rack Actually Needs Anchoring
Not every home power rack needs to be bolted down. A heavy full cage with a rear stabiliser, weight storage pegs and 100kg of plates sitting on it can be stable enough for controlled squats and bench work. A narrow folding rack, half rack or lightweight cage used for kipping pull-ups is a different story.
The quick stability test
Before drilling, build the rack fully, tighten every frame bolt, add any rear cross-member or stabiliser bar, and put the rack where it will actually live. Then test it unloaded:
- Pull-up test. Hang from the bar and gently swing forward and back. Any foot lift means anchoring is sensible.
- J-cup test. Re-rack an empty bar with normal force. If the rack walks or twists, fix it down.
- Band test. If you use resistance bands pulling from the rack, assume you need anchors.
- Spotter-arm test. Drop an empty bar lightly onto safeties from a few centimetres. Movement now becomes worse with weight.
I would anchor any rack used for heavy squats, pull-ups, band work or aggressive re-racking. I would be more relaxed with a heavy cage used only for slow bench and squat work, especially if it has loaded plate storage. If you are still choosing the rack, our best squat racks UK guide explains which designs are naturally more stable.
Anchoring is not a cure for a poor rack
Do not bolt down a rack that already feels flimsy because the steel is thin, the holes are badly aligned or the base is bent. Anchors stop the feet moving; they do not turn a weak rack into a commercial-grade cage. If the uprights flex, the J-cups wobble or the safeties feel vague, fix that problem first.
For most UK garage gyms, anchoring is about stopping a decent rack shifting on concrete. It is not a substitute for buying a rack with sensible steel thickness, proper safeties and enough footprint for the lifts you do. If the whole setup is still at planning stage, start with choosing the right home gym equipment before committing holes to the floor.
Check The Garage Floor Before You Drill
The floor matters more than the drill. Most garage slabs are concrete, but age, thickness and condition vary. Some have thin screed over weaker material. Some have cracks, damp patches or uneven sections where anchors will never hold well.
What you are looking for
Walk the rack area and check:
- Cracks around the planned feet. Avoid fixing close to cracks, edges or patched concrete.
- Thin or hollow-sounding sections. Tap with a hammer. A hollow sound can mean screed or a void under the surface.
- Sloping floor. Many garages slope towards the door. You may need shims before anchoring.
- Services. Be careful around modern garages with underfloor pipes, electric runs or unknown previous work.
If the floor is badly cracked or you are not sure what is under it, stop and ask a builder before drilling. That sounds cautious, but repairing a failed anchor hole beside a rack foot is more irritating than paying for a quick opinion.
Dust and lifting risks
Concrete drilling creates fine dust. The HSE has specific guidance on construction dust and silica exposure, so use extraction, ventilation and a proper mask rather than drilling in a closed garage and hoping for the best. Moving a rack around is also a manual-handling job; the HSE’s manual handling guidance is worth a read if you are doing this alone.
My rule is simple: if I cannot move the rack without dragging, twisting or swearing, I get another person to help. Power racks are awkward rather than just heavy, and awkward is how backs get tweaked.

Tools, Fixings And UK Costs
You do not need a van full of trade tools, but a normal cordless drill is often the wrong tool for concrete. Use the right drill and the job feels controlled. Use the wrong one and you spend half an hour polishing a shallow hole.
Tool list
For a typical garage concrete slab, plan on:
- SDS drill. Hire one for about £20-£35 per day, or buy a budget model for £60-£120 from Screwfix, Toolstation or B&Q.
- Masonry bits. A decent SDS bit set is about £10-£25. Match the bit to the anchor size.
- Through bolts or sleeve anchors. M10 or M12 fixings are common; a pack is usually £8-£20.
- Socket set or spanner. £10-£30 if you do not already own one.
- Vacuum or hand pump. Clean holes grip better. A cheap blow-out pump is about £8-£15.
- Eye protection, ear protection and FFP3 mask. Budget £15-£30 if you need the lot.
If you already own an SDS drill, this can be a £20 job. If you need every tool, budget nearer £80-£160, or hire the drill and buy the fixings. For one rack, hiring makes sense unless you will use the drill for other garage jobs.
Which fixings to buy
Most home lifters use through bolts, wedge anchors or sleeve anchors. For a rack foot plate with 11-14mm holes, M10 fixings often fit. Heavier racks with larger foot holes may take M12.
I prefer named fixings from Rawlplug, Fischer or ForgeFix over anonymous marketplace packs. A pack of M10 through bolts from Screwfix or Toolstation is usually under £15, and the quality difference is worth the tiny saving you give up. Stainless fixings cost more and are usually unnecessary inside a dry garage.
Check the rack manual before buying. Some brands specify anchor diameter, minimum embedment and washer size. If your rack came with tiny fixings, I would still compare them against the foot plate, slab depth and manufacturer’s instructions. Cheap supplied anchors are not always the ones I would trust.
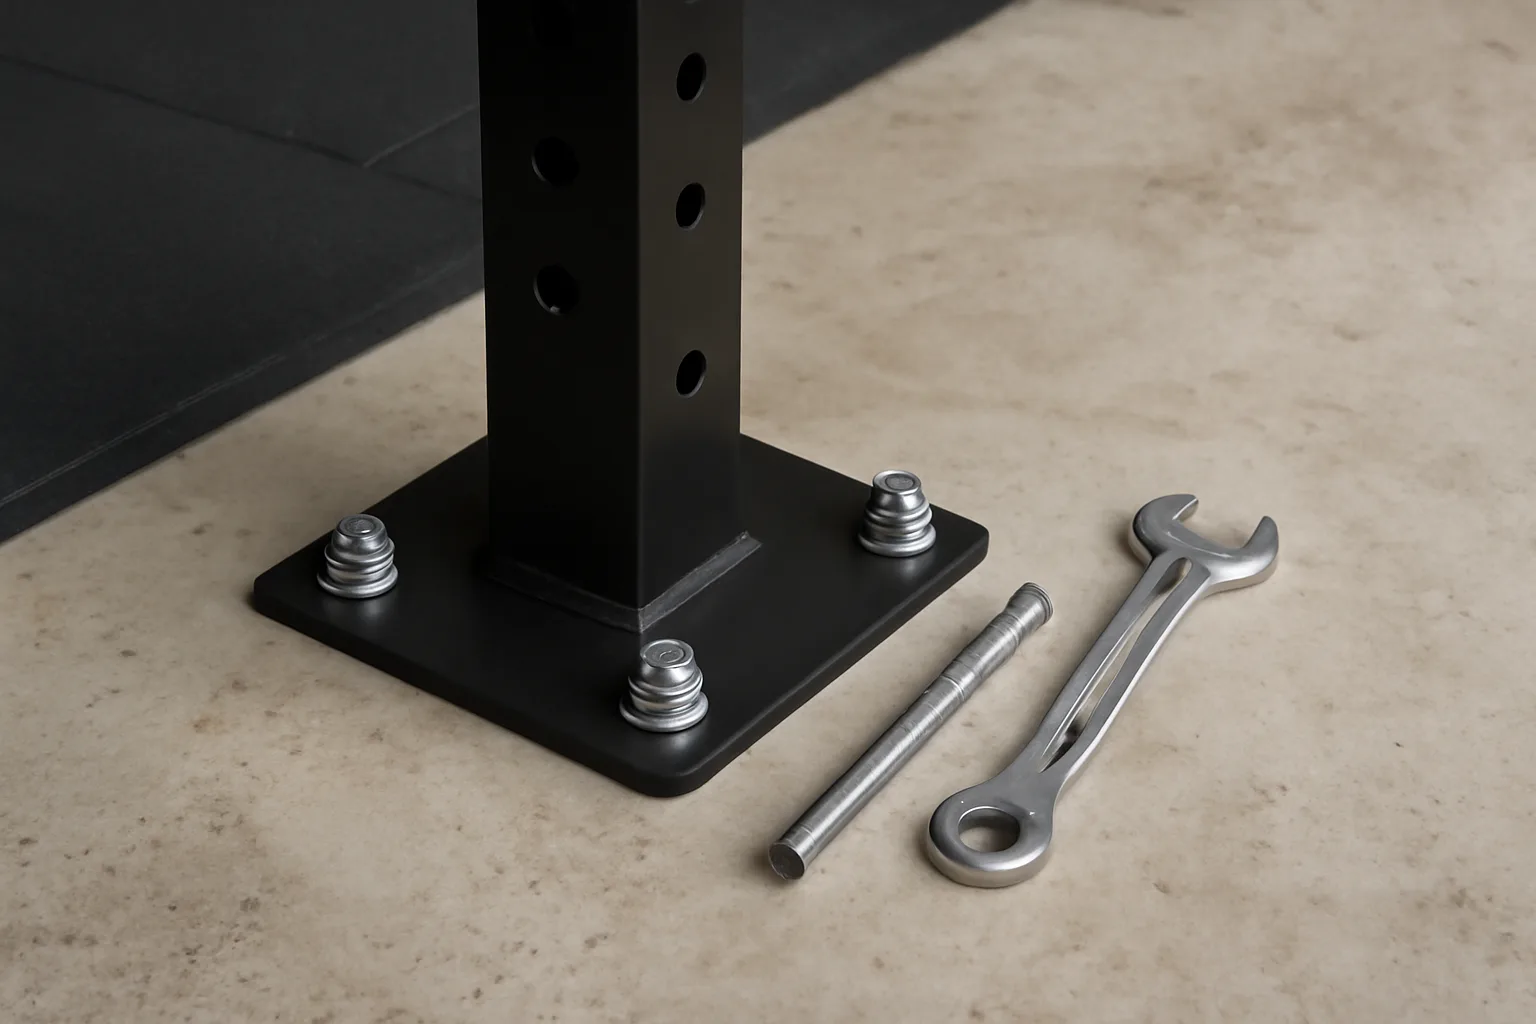
How To Anchor A Power Rack To Your Garage Floor
This is the practical method for a concrete garage floor. It assumes the rack is assembled, square and in its final location. If your floor is timber, block paving, asphalt or a suspended slab, this is not the right method.
Step-by-step method
- Place the rack and check clearances. Leave space for plates, bench movement, pull-ups and walking around the rack. Once drilled, you will not want to move it 5cm left.
- Level and square the rack. Measure diagonally between opposite uprights if needed. Use metal shims under feet if the garage slope leaves one foot floating.
- Mark the holes. Use a marker through each foot plate. Mark all holes before drilling, then move the rack aside if access is tight.
- Drill pilot holes if useful. A small pilot can help keep larger SDS bits from skating on hard concrete.
- Drill to the correct depth. Use tape on the bit as a depth marker. Drill slightly deeper than the anchor embedment so dust and the bolt tip have room.
- Clean each hole. Vacuum and blow out dust. This is not optional; dusty holes reduce grip.
- Move the rack back and insert fixings. Fit washers and nuts correctly, then tap anchors down if the fixing type requires it.
- Tighten gradually. Work around the rack rather than fully tightening one corner first. The base should pull down evenly.
- Recheck the frame bolts. Anchoring can reveal a slightly twisted frame. Tighten the rack hardware again after the feet are fixed.
Do not use maximum force to compensate for a bad hole. If an anchor spins, pulls up or never tightens, remove it and fix the hole properly. Forcing it usually makes the concrete worse.
How many anchors?
Use every manufacturer-provided floor hole unless the manual says otherwise. Two anchors can stop a light rack sliding, but four or more anchors give better resistance to twisting and tipping. A full rack may have eight holes across four feet. If only the front feet are fixed, the rear can still shift during pull-ups or band work.
If you have rubber gym flooring, either cut neat holes through the flooring or anchor directly through thin rubber only where the rack manufacturer allows it. Thick rubber between steel foot and concrete can compress, making the anchor feel tight at first and loose later. Our gym flooring guide covers the difference between thin tiles, rolls and heavy mats.
Mistakes That Make A Rack Less Safe
Most failed rack installs are not dramatic. They are small errors that add up: a hole too close to a crack, dust left inside, a rack foot sitting on soft rubber, or anchors tightened unevenly.
The common ones
Watch for:
- Drilling too close to an edge. Concrete can crack away around the fixing.
- Using plugs meant for light household jobs. Brown wall plugs are not power-rack anchors.
- Anchoring over thick mats. The mat compresses and the rack loosens.
- Skipping hole cleaning. Dust stops anchors biting properly.
- Mixing fixing sizes. One loose corner is enough to make the rack feel wrong.
- Ignoring rack alignment. A twisted rack can make safeties and J-cups sit badly.
The other mistake is overconfidence. A rack that feels solid when empty can still move when a loaded bar hits the safeties. Test with light loads first, then work up. This matters even more if your garage gym is compact and the rack sits near a wall, car, freezer or storage shelves.
Noise is worth thinking about too. Anchoring can transfer more vibration into the slab when you re-rack a bar. If that is already a problem, read our guide to reducing noise in a home gym before assuming bolts alone will make the setup feel better.
When Not To Drill
Sometimes the best answer is not to anchor the rack yourself. That is not failure; it is avoiding a mess.
Renters and shared garages
If you rent, ask before drilling. A few anchor holes in a garage floor may seem minor, but it is still a permanent change. Landlords vary. Some will not care. Some will care a lot when you move out.
Non-drill options include:
- Adding plate storage. Loaded storage pegs can make a rack far steadier.
- Using a rack with a rear stabiliser. Less convenient, but often enough for controlled lifting.
- Building a lifting platform. Bolt the rack to a timber platform instead of the floor, though this needs careful construction.
- Choosing a heavier rack. Sometimes the right fix is a better frame, not floor anchors.
A platform can work well if you cannot drill, but it is not just a sheet of plywood thrown under the rack. You need enough thickness, width and weight to resist tipping. If you are still planning the room layout, our garage gym setup guide is a better starting point.
Weak or unknown floors
Do not drill into crumbling concrete, loose screed or an unknown suspended floor without advice. Also avoid drilling if you know there are services in the area. Modern garages sometimes have pipes or cables where older garages would not.
If in doubt, pay a local builder or competent installer to assess it. The cost of an hour’s advice is small compared with a damaged slab or a rack you no longer trust.
Final Safety Checks Before Lifting
Once the rack is anchored, do not load it to your max squat straight away. Treat the first session as a commissioning check.
Before the first real workout
Run through this:
- All anchors tight. Check each nut or bolt after the rack has settled.
- Rack frame tight. Recheck upright, cross-member and pull-up bar bolts.
- Feet flat. No visible rocking, gaps or compressed soft matting.
- Safeties level. Spotter arms or safety bars should sit evenly on both sides.
- J-cups secure. Test both sides with an empty bar before adding plates.
- Clear working area. No tools, spare anchors or offcuts underfoot.
Then do a light session. Empty bar, then warm-up weight, then normal loads. After the first workout, check the anchors again. If anything has loosened, solve it before lifting heavy.
My preference is simple: if you own the garage, have a sound concrete slab and use a rack for pull-ups, heavy squats or band work, anchoring is worth doing. Use decent M10 or M12 fixings, clean the holes, tighten evenly and test before trusting it. If you rent, have a questionable floor or do not know what you are drilling into, choose a non-drill stability option or get proper advice first.
Frequently Asked Questions
Do all power racks need to be anchored? No. Heavy full racks with stabilisers and loaded plate storage may be stable enough for controlled lifting. Lightweight racks, folding racks and racks used for pull-ups or band work are better anchored.
What size bolts should I use for a power rack? Many home racks use M10 or M12 concrete anchors, but check the rack manual and foot-plate hole size. Use named through bolts, wedge anchors or sleeve anchors rather than light household wall plugs.
Can I anchor a power rack through rubber flooring? Thin rubber may be workable if the rack manufacturer allows it, but thick mats can compress and loosen the fixing. The better approach is usually to cut neat holes so the rack feet bear on concrete.
Can renters anchor a power rack? Only with permission. Anchoring leaves holes in the garage floor. Renters should consider plate storage, rear stabilisers, a heavier rack or a properly built lifting platform.
Can I use a normal cordless drill for concrete anchors? Sometimes, but an SDS drill is much better for garage concrete. Hire one for about £20-£35 if you only need it for one job.
Should I get someone else to install rack anchors? Yes if the floor is cracked, hollow, unknown or near possible services. A competent installer or builder is cheaper than repairing a bad slab or trusting a loose rack.