You’ve just finished a heavy leg session, your quads are screaming, and someone at the gym hands you a foam roller and says “just roll it out.” Helpful, right? Except nobody tells you how long, how hard, which direction, or why certain bits hurt so much you want to cry. Foam rolling works — but only if you do it properly, and most people don’t. For related guidance, see our Best Foam Rollers 2026 UK: Smooth, Grid & Vibrating guide. For related guidance, see our Rubber vs Foam vs Puzzle Gym Flooring: Which Is Best? guide.
In This Article
- What Foam Rolling Actually Does to Your Muscles
- When to Foam Roll: Before or After Exercise
- Choosing the Right Foam Roller
- Basic Foam Rolling Technique
- Upper Body Foam Rolling Routine
- Lower Body Foam Rolling Routine
- Foam Rolling for Common Problem Areas
- How Long and How Often to Foam Roll
- Foam Rolling Mistakes That Make Things Worse
- Foam Rolling vs Massage Guns vs Stretching
- Building a Recovery Routine Around Foam Rolling
- Frequently Asked Questions
What Foam Rolling Actually Does to Your Muscles
Let’s clear up the biggest myth first: foam rolling doesn’t “break up” adhesions or scar tissue. The forces involved are nowhere near enough for that. What it actually does is stimulate the nervous system to reduce muscle tone (tightness) and increase blood flow to the area. The result feels the same — less tightness, better range of motion — but the mechanism is neurological, not mechanical.
Research consistently shows that foam rolling before exercise can improve range of motion by 4-7% without reducing strength or power output. I’ve been incorporating pre-workout rolling for over a year now, and the difference in my squat depth on the first working set is real. That’s the key finding: unlike static stretching, foam rolling doesn’t make you weaker.
The Science in Plain English
When you roll over a muscle, pressure receptors in your fascia (the connective tissue wrapping) send signals to your brain. Your brain responds by telling the muscle to relax — reducing that protective tension that builds up from training. After a few minutes of rolling, the muscle feels noticeably different. Less dense, more pliable, less resistant to movement.
What the Research Shows
- Pre-exercise rolling: Improves range of motion for 10-20 minutes without affecting strength
- Post-exercise rolling: Reduces perceived muscle soreness by 1-2 points on a 10-point scale
- Consistent rolling over weeks: Gradually improves baseline flexibility
- One-off sessions: Temporary relief only — you need regularity for lasting changes
When to Foam Roll: Before or After Exercise
This is where most gym advice gets it wrong. The answer isn’t one or the other — it depends on what you’re trying to achieve.
Before Exercise (2-3 Minutes Per Area)
Roll the muscles you’re about to train. Quick, moderate pressure, focus on increasing range of motion. This isn’t a deep tissue session — it’s a warm-up tool. I’ve been doing this before every leg session for over a year now, and the difference in my squat depth in the first working set is night and day.
- Leg day: Quads, hamstrings, calves, glutes — 30 seconds each
- Upper body day: Thoracic spine, lats, chest — 30 seconds each
- Full body: Hit the tightest areas only — don’t spend 20 minutes rolling before you’ve even touched a weight
After Exercise (5-10 Minutes Total)
This is your recovery window. Slower rolling, slightly more pressure (but still not painful — more on that later). Focus on the muscles you just trained plus any chronically tight areas.
On Rest Days
A 15-20 minute full-body roll on rest days is one of the best recovery tools available. Better than sitting on the sofa feeling sorry for yourself. I do mine while watching TV — it doesn’t need your full attention once you know the movements.
Choosing the Right Foam Roller
Not all foam rollers are the same, and the wrong one can range from useless to actively painful.
Smooth Foam Rollers
The standard option. A simple cylinder of dense foam, typically 90 cm long and 15 cm in diameter. Best for beginners or anyone who hasn’t rolled before. Expect to pay about £15-25 for a decent one.
- Best for: General rolling, beginners, warm-up
- Brands to look at: Trigger Point GRID (about £30 from Amazon UK), Decathlon’s own brand (about £12), Myprotein foam roller (about £18)
Textured/Grid Rollers
These have raised ridges or bumps that dig into muscles more precisely. The Trigger Point GRID is the most popular and the one we’ve used most in testing. The different textures — flat, bumpy, ridged — target tissues from different angles.
- Best for: Intermediate users, targeted work on specific muscles
- Price range: £25-40
Vibrating Foam Rollers
A newer category. The vibration adds a secondary stimulus that can further reduce muscle tone. The Hyperice Vyper 3 (about £150 from Sweatband.com) is the gold standard but it’s expensive. The Pulseroll vibrating roller (about £90) is a solid mid-range option available from Argos.
- Best for: Athletes, people with chronically tight muscles, anyone who finds regular rolling too painful
- Trade-off: Heavy, needs charging, expensive
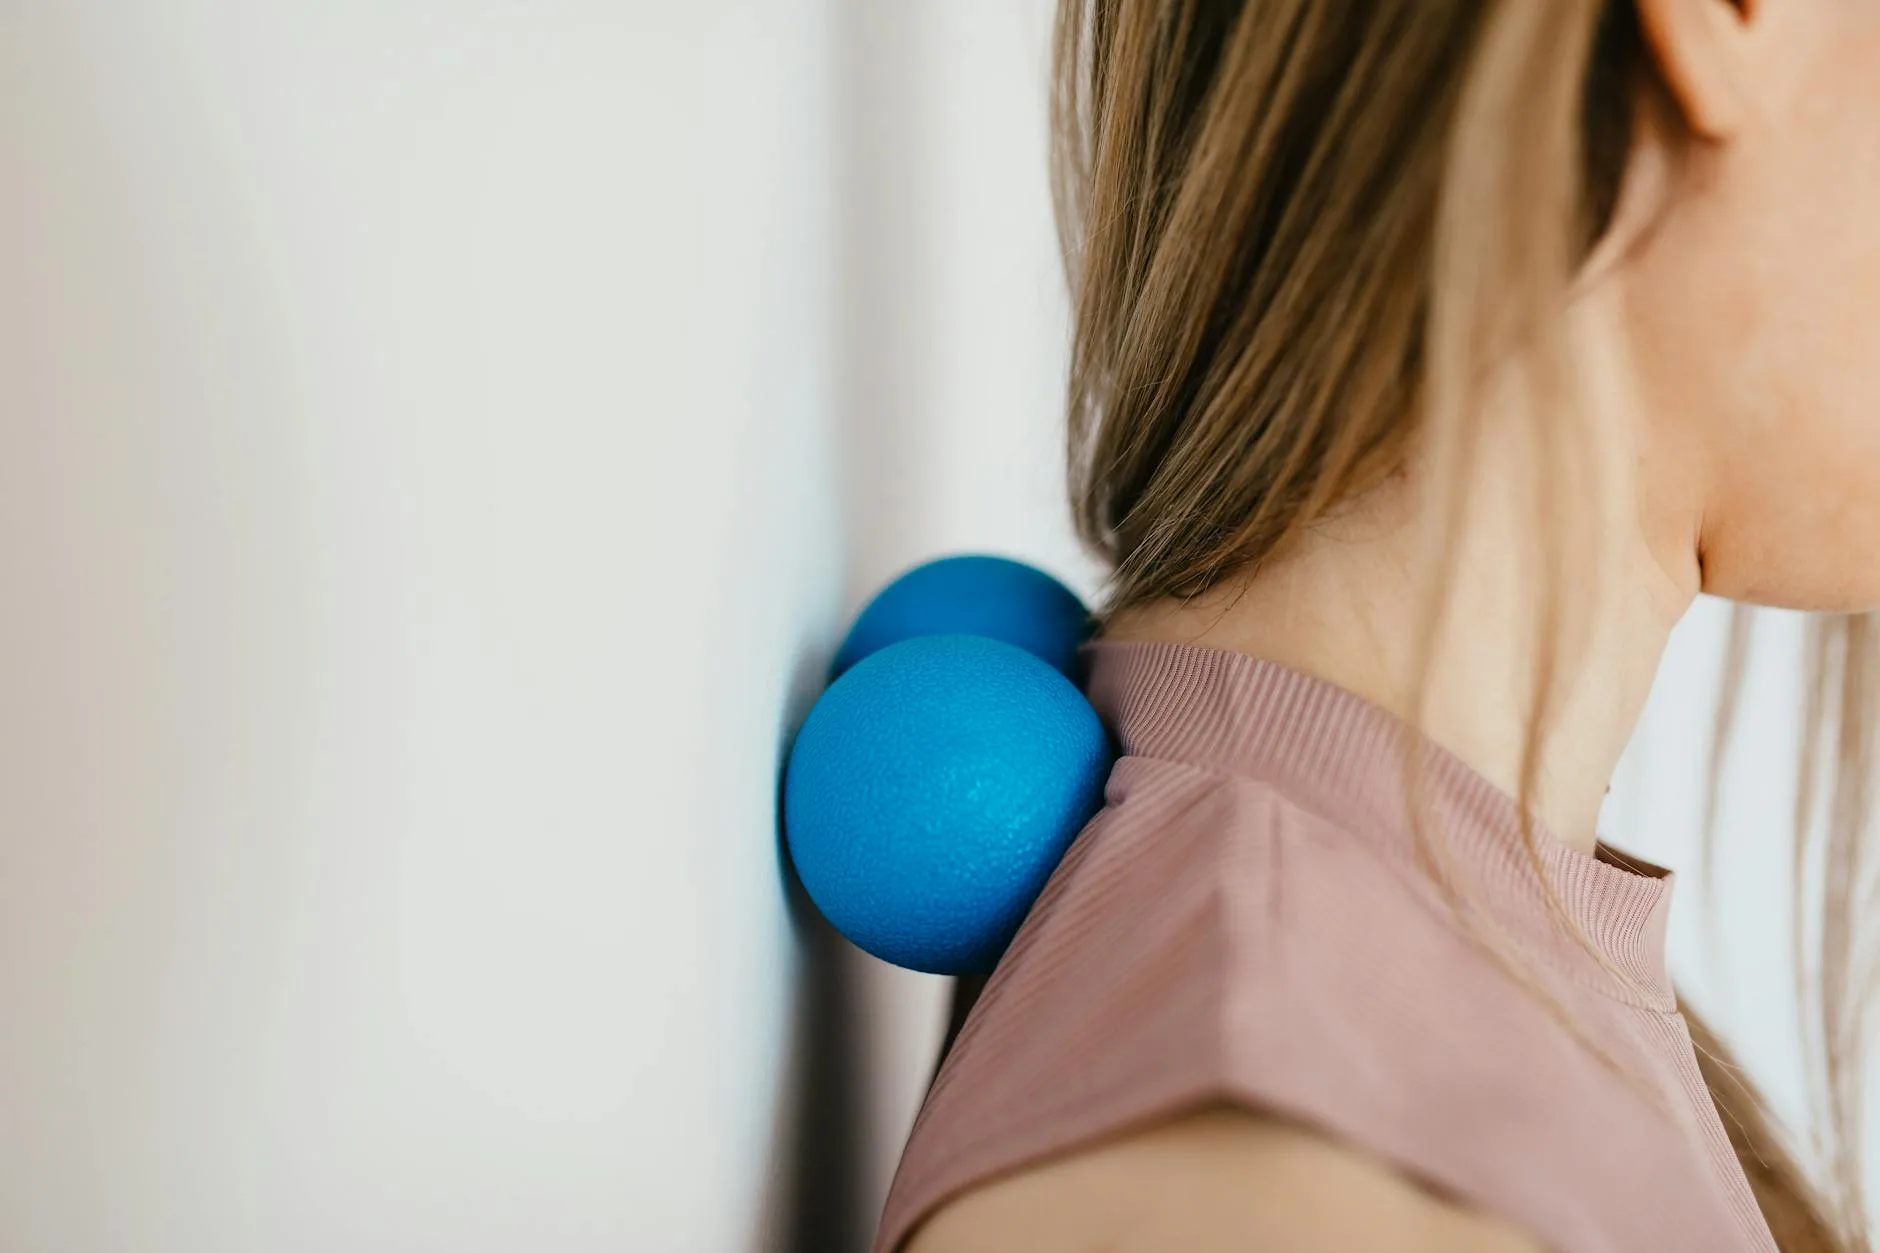
Mini Rollers and Balls
For hard-to-reach areas — glutes, between shoulder blades, feet — a massage ball or mini roller works better than a full-size roller. A simple lacrosse ball (about £5) or peanut ball (two lacrosse balls taped together, or buy one for about £10) gives precise pressure exactly where you need it.
Basic Foam Rolling Technique
The technique is simple but most people get it wrong by rolling too fast or too aggressively.
The Right Way
- Position yourself on the roller with the target muscle making contact
- Use your hands and feet to control how much body weight presses into the roller
- Roll slowly along the length of the muscle — about 2-3 cm per second
- When you find a tender spot, stop and hold pressure for 20-30 seconds
- The tenderness should decrease by at least 50% before you move on
- Continue rolling through the full range of the muscle
- Spend 30-90 seconds per muscle group
Pressure Guidelines
- Light pressure: You can breathe normally and hold a conversation. Good for warm-up.
- Moderate pressure: You feel definite pressure but can still breathe deeply. Good for recovery.
- Heavy pressure: You’re grimacing and holding your breath. This is TOO MUCH. Back off.
The “no pain, no gain” mentality doesn’t apply here. If you’re tensing up to protect yourself from the roller, you’re defeating the purpose — you’re trying to relax the muscle, not make it tense harder.
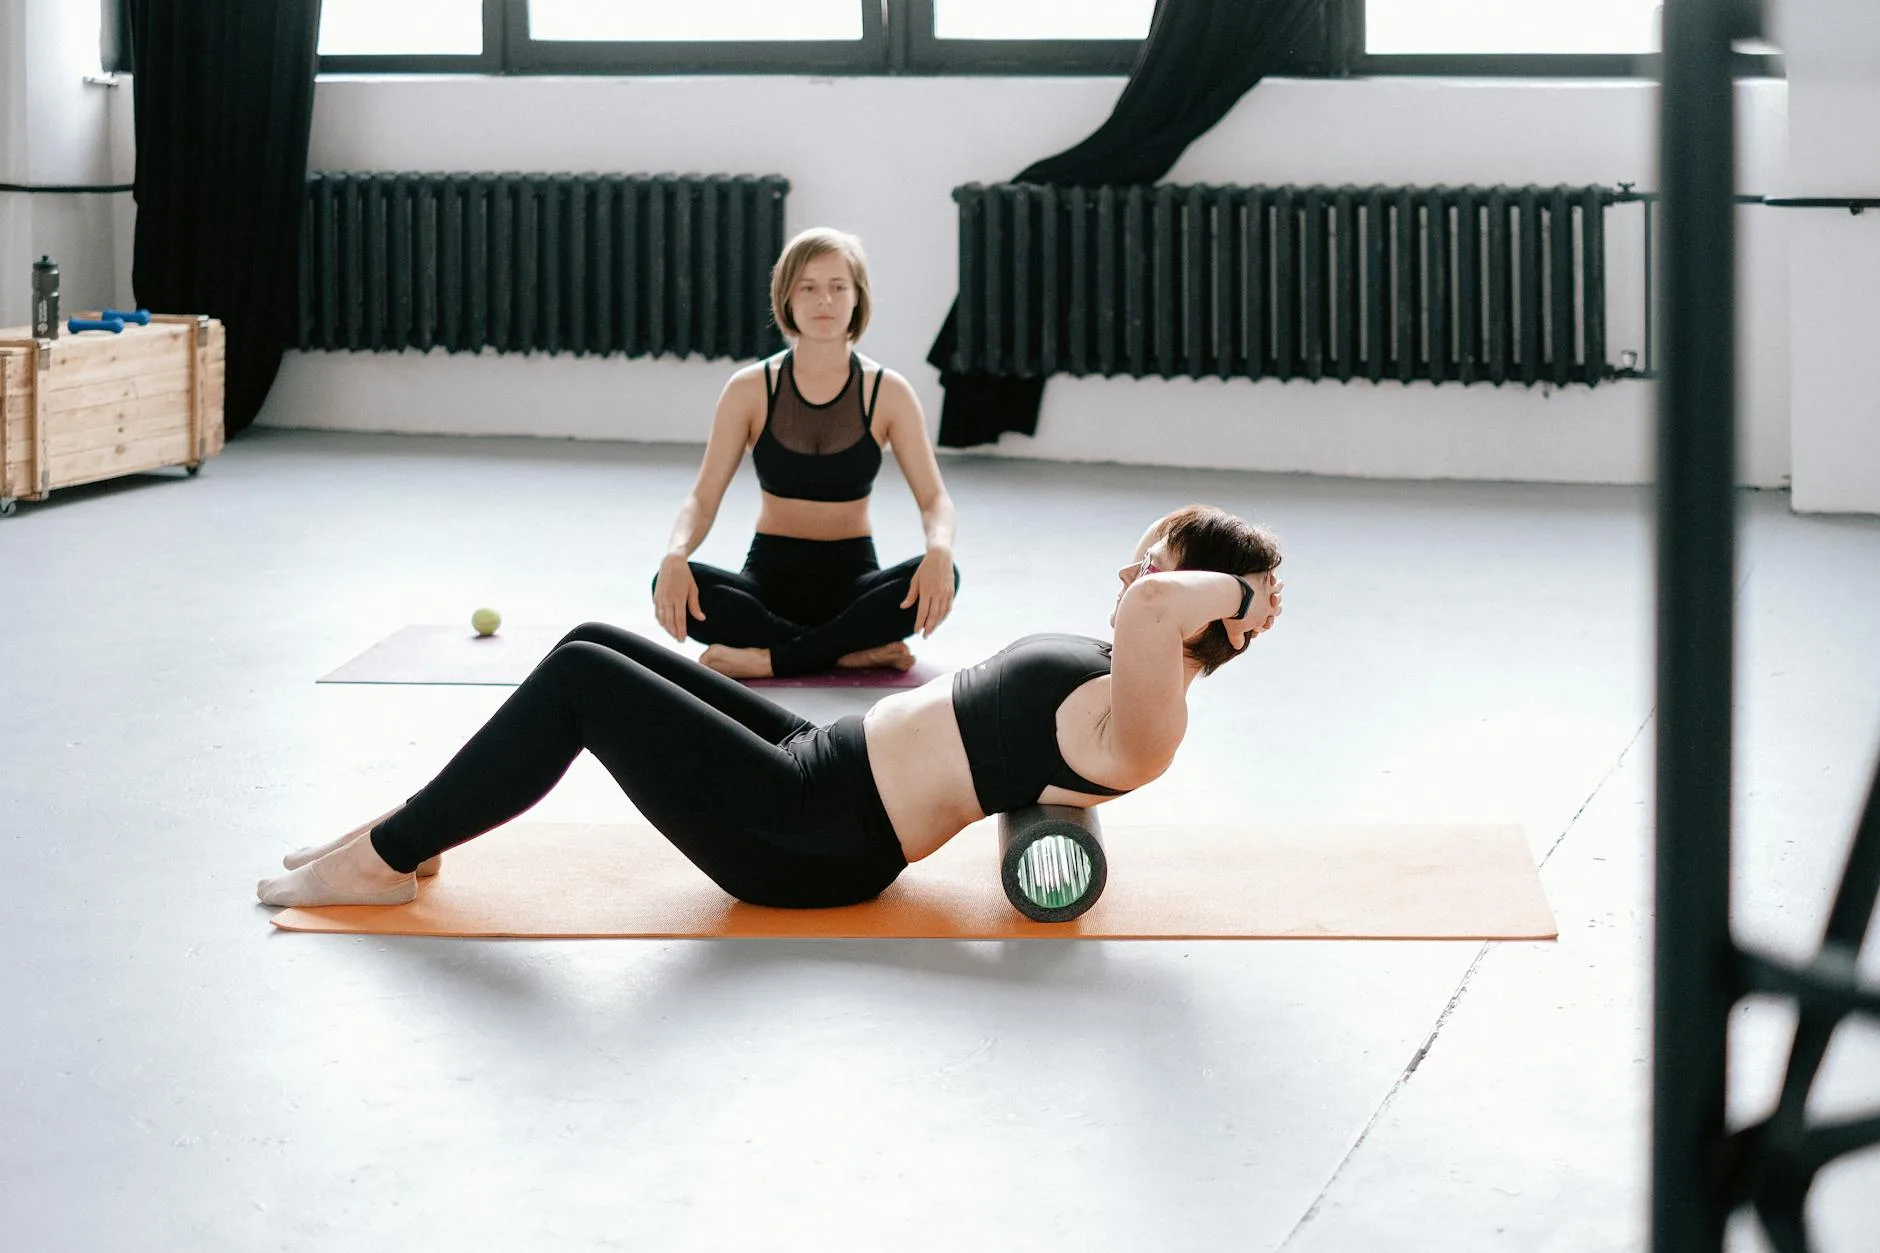
Upper Body Foam Rolling Routine
Thoracic Spine (Upper Back)
This is the single most beneficial area to roll for desk workers. After testing different approaches over several months of desk work and gym sessions, this sequence works best:
- Lie face-up with the roller perpendicular to your spine, positioned at the bottom of your shoulder blades
- Cross your arms over your chest or hold them behind your head
- Slowly roll from the bottom of your shoulder blades up to the base of your neck
- Spend extra time on any spots that feel restricted — you’ll know them when you find them
- 60-90 seconds total
Lats (Side of Back)
- Lie on your side with the roller under your armpit
- Your bottom arm extends overhead
- Roll from the armpit down to the bottom of your ribcage
- This one’s often surprisingly tender — start light
- 30-60 seconds per side
Chest and Front Shoulders
- Lie face down with a massage ball (not a full roller — too awkward) under your chest, between the shoulder and sternum
- Apply gentle pressure and roll small movements in all directions
- Focus on the area where the chest meets the front of the shoulder
- 30 seconds per side
Lower Body Foam Rolling Routine
Quads
The quad roll is the classic foam rolling exercise, and probably the one you’ll feel most.
- Lie face down with both thighs on the roller
- Use your forearms to control movement (plank position)
- Roll from just above the knee to the hip crease
- To increase pressure, lift one leg and roll one quad at a time
- Rotate slightly inward and outward to hit the inner and outer quad
- 60-90 seconds per leg
Hamstrings
- Sit on the floor with the roller under both thighs
- Hands behind you on the floor for support
- Roll from just above the back of the knee to the bottom of your glutes
- Cross one leg over the other to increase pressure on a single hamstring
- 60-90 seconds per leg
IT Band and Outer Thigh
This is the one everyone loves to hate. The iliotibial band runs along the outside of your thigh from hip to knee, and rolling it can be properly uncomfortable.
- Lie on your side with the roller under your outer thigh
- Your top leg can be placed in front for balance and to control pressure
- Roll from the hip down to just above the knee
- Start with light pressure — the IT band area has a lot of nerve endings
- 30-60 seconds per side (work up to longer over weeks)
Calves
- Sit with the roller under one calf
- Cross the other leg on top for extra pressure if needed
- Roll from the ankle to just below the knee
- Rotate your leg inward and outward to hit the inner and outer calf
- 30-60 seconds per leg
Glutes
- Sit on the roller with one ankle crossed over the opposite knee (figure-four position)
- Lean toward the crossed leg’s side
- Roll in small circles to find the tight spots deep in the glute
- A lacrosse ball works better here for most people — more precise pressure
- 60-90 seconds per side
Foam Rolling for Common Problem Areas
Desk Worker Neck and Shoulder Tension
If you sit at a desk all day, your upper traps, chest, and thoracic spine are almost always tight. I work at a desk setup myself and noticed the difference immediately once I started a targeted rolling routine.
- Thoracic spine roll — 90 seconds
- Chest/front shoulder with ball — 30 seconds each side
- Lat roll — 30 seconds each side
- Upper trap with ball against wall — 30 seconds each side
Do this every evening and within a week you’ll notice less tension headaches and better posture.
Runner’s Knee Prevention
Runners are notorious for tight quads and IT bands, which pull the kneecap out of alignment. A NHS guide on knee pain recommends strengthening alongside flexibility work — foam rolling covers the flexibility side.
- Quad roll — 60 seconds each leg
- IT band — 30 seconds each side (light to moderate pressure)
- Calf roll — 30 seconds each leg
- Glute roll — 30 seconds each side
Post-Leg Day Recovery
This is the routine I use after heavy squat or deadlift sessions. It doesn’t eliminate DOMS (delayed onset muscle soreness) but noticeably reduces the severity:
- Quads — 90 seconds each
- Hamstrings — 60 seconds each
- Glutes — 60 seconds each
- Calves — 30 seconds each
- Adductors (inner thigh) — 30 seconds each
Total time: about 10 minutes. Worth every second when you can actually walk down stairs the next day.
How Long and How Often to Foam Roll
Session Duration
- Pre-workout: 5-10 minutes maximum. You’re warming up, not doing a full recovery session.
- Post-workout: 10-15 minutes. Focus on the muscles you trained.
- Recovery day: 15-20 minutes. Full body, slower pace, deeper work.
Frequency
- Daily rolling of tight areas is ideal and safe
- Pre and post workout for trained muscles
- Minimum 3 times per week to see lasting changes
- Once a week provides temporary relief but won’t improve baseline flexibility
Progression Over Weeks
Week 1-2: Light to moderate pressure, smooth roller only, 5-10 minutes per session Week 3-4: Moderate pressure, introduce textured roller, 10-15 minutes Week 5+: Moderate to firm pressure, add lacrosse ball work for specific areas, 15-20 minutes
Foam Rolling Mistakes That Make Things Worse
Rolling Directly on the Lower Back
Never roll the lumbar spine. The lower back doesn’t have the rib cage to protect it, and aggressive rolling can hyperextend the spine and aggravate disc issues. Use a ball for targeted trigger points in the lower back muscles, but only with gentle pressure and specific targeting.
Rolling Over Joints
The roller should work muscles, not bones. Rolling directly over your knee, ankle, or elbow joint is uncomfortable and pointless. Stop about 5 cm short of any joint.
Going Too Fast
Speed rolling — zipping back and forth like you’re trying to start a fire — does almost nothing. The neurological response requires sustained pressure. Slow down. Way down. If you’re rolling a muscle in under 20 seconds, you’re going too fast.
Rolling Inflamed or Injured Areas
If a muscle is actually injured — sharp pain, swelling, bruising — foam rolling will make it worse. Rolling is for tight, overworked muscles, not damaged ones. If in doubt, wait 48 hours and see if the pain resolves before rolling.
Holding Your Breath
If you’re holding your breath, the pressure is too high. Breathe normally throughout. Deep, steady breaths actually help the muscle relax further.
Foam Rolling vs Massage Guns vs Stretching
All three have a place in recovery, but they’re not interchangeable.
Foam Rolling
- Best for: Large muscle groups, pre-workout warm-up, general recovery
- Cost: £12-150 depending on type
- Portability: Moderate (full-size rollers are bulky)
- Time needed: 10-20 minutes for full body
Massage Guns
- Best for: Targeted areas, travel, people who find rolling too uncomfortable
- Cost: £50-600 (Theragun Pro is about £550, but the Theragun Mini at £175 or the Eleeels X1T at about £50 from Amazon UK work well for home use)
- Portability: Good (especially mini models)
- Time needed: 5-10 minutes for full body
Static Stretching
- Best for: Post-workout cooldown, improving flexibility long-term
- Cost: Free
- Portability: Perfect
- Time needed: 10-15 minutes for full body
- Caveat: Static stretching before exercise can reduce strength output by 5-7%. Save it for after.
The Ideal Combination
For most gym-goers, the best approach is:
- Before exercise: Foam rolling (5 minutes) → dynamic stretching (5 minutes)
- After exercise: Foam rolling (10 minutes) → static stretching (5-10 minutes)
- Rest days: Full body rolling (15-20 minutes) or massage gun session
Building a Recovery Routine Around Foam Rolling
Recovery isn’t just foam rolling — it’s part of a system. Here’s how the pieces fit together for someone training at a home gym or commercial gym 3-5 times a week.
The Non-Negotiables
- Sleep: 7-9 hours. No amount of rolling compensates for 5 hours of sleep. If you want to understand how heart rate zones affect recovery, tracking your resting heart rate each morning gives you a simple recovery metric.
- Hydration: Dehydrated muscles are tighter muscles. Aim for 2-3 litres daily.
- Nutrition: Protein within 2 hours post-workout. Carbs to replenish glycogen. The basics matter more than supplements.
Weekly Recovery Template
- Training days: 5-10 min foam rolling pre-workout + 10 min post-workout
- Rest days: 15-20 min full body rolling + 10 min stretching
- Weekly: One longer recovery session (30 min rolling + stretching + perhaps a bath with Epsom salts)
Equipment Starter Kit
If you’re building a home recovery setup from scratch, you need surprisingly little. A guide to setting up a home gym on a budget covers the training side, but for recovery:
- Smooth foam roller (£12-15 from Decathlon)
- Lacrosse ball (£5 from Amazon UK)
- Resistance band for stretching (£8-12 for a set)
- Total cost: About £25-30
That’s it. You don’t need a vibrating roller, a massage gun, a percussion device, and a stretching strap. Start simple, add tools only when you know you need them. After building a solid home gym workout plan, bolt recovery onto the end rather than treating it as separate.
Frequently Asked Questions
Can foam rolling replace stretching? Not entirely. Foam rolling improves range of motion temporarily and reduces perceived tightness, but static stretching produces longer-lasting flexibility gains when done consistently. The two work best together: foam rolling before exercise (instead of static stretching, which can reduce performance), and static stretching after exercise alongside foam rolling for recovery.
Is it normal for foam rolling to hurt? Mild discomfort on tight areas is normal — a “hurts so good” feeling around 5-6 out of 10 on a pain scale. Anything above 7/10 is too much and will cause the muscle to tense up defensively, defeating the purpose. Sharp, stabbing, or burning pain means you should stop immediately and consult a physiotherapist. If you’re new to rolling, start with light pressure and increase gradually over weeks.
How soon before a workout should I foam roll? Roll the target muscles 5-10 minutes before you start your warm-up sets. The range-of-motion benefits last about 10-20 minutes, so rolling too early means the effect wears off before your working sets. A good sequence is: foam roll (5 min) → dynamic warm-up (5 min) → warm-up sets → working sets.
Do I need an expensive foam roller or will a cheap one work? For beginners, a £12-15 smooth roller from Decathlon or Amazon UK is perfectly adequate. The expensive options — textured grid rollers (£30-40) and vibrating rollers (£90-150) — offer benefits for regular users, but the basic foam roller covers 90% of what most gym-goers need. Upgrade once you’ve been rolling consistently for a month and know which areas need more targeted work.
Can I foam roll every day? Yes, daily foam rolling is safe and beneficial for most people. The tissue stress from rolling is low enough that it doesn’t need recovery time. The exception is rolling an area that’s actively injured (swollen, bruised, acutely painful) — in that case, rest the area until symptoms resolve. For general tightness and recovery, daily rolling of problem areas produces the best results.